• Tutorial
    • AWS
    • Oracle
    • WordPress
    • Azure DevOps
  • About me
Tutorial
    AWS
    Oracle
    Wordpress
    Azure DevOps
About me
cedricleruth - It's still magic even if you know how it's done
  • Tutorial
    • AWS
    • Oracle
    • WordPress
    • Azure DevOps
  • About me

How to host a static website with Amazon AWS S3 and Route53?

Screenshot of AWS S3 Static Website Hosting Panel

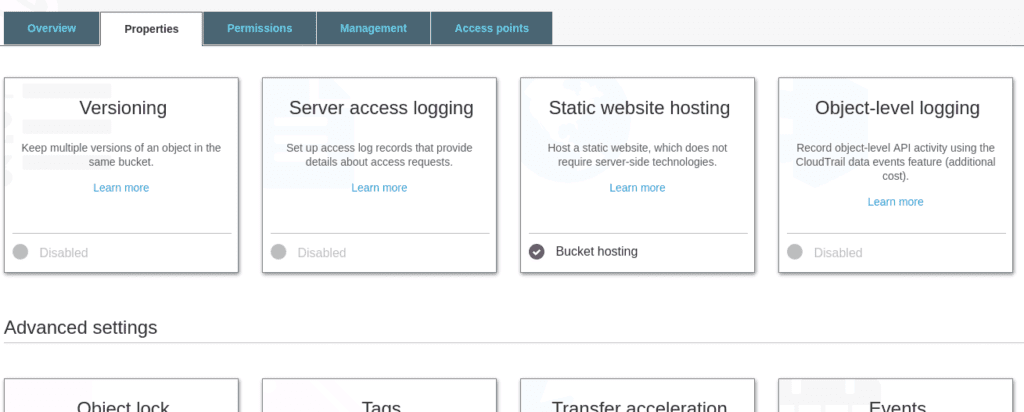
Static websites are a great way to run a simple and inexpensive portfolio or landing page. And it’s even free if you leverage the AWS S3 free tier that allows you to host your static website for up to 5Gb storage and 20 000 visitors.

In this tutorial, I will cover on how to host your static website on AWS S3 with an AWS Route 53 domain name.

1.Setup and login to your Amazon AWS account

If you don’t already own an AWS account, head up to aws.amazon.com and register for a free tier account. The AWS S3 free tier is a 12-month free tier offer that is accessible to new AWS customers and is available for 12 months following your AWS sign-up date. When your 12-month free usage term terminates or if your application usage surpasses the tiers, you pay standard service rates for the service you use. For AWS S3, it’s around $0.0004 per user accessing your site, while owning a domain name on Route 53 costs around $12 per year.

2. Create an AWS S3 bucket to host your site

Once your logged into the console and have your static website ready to be deployed, reach the AWS S3 service and create a public bucket :

  • Create bucket > Name and region > Bucket Name: yoursitename.com (It needs to be the exact same name as in the domain name your gonna own in Route 53 so ensure it’s available!)
  • Create bucket > Name and region> Region: the region where you want to host your site
  • Create bucket > configure options: leave as default
  • Create bucket > Review: Confirm and create bucket.

3. Upload and enable your static website on your AWS S3 bucket

Now that your bucket is created and accessible to the world, we need to configure it as a website:

  • Amazon S3 > YOUR_BUCKET > Overview > Upload: upload your full static website. This website needs to include an index.html and error.html file. (During the upload ensure that the file permission is set to “Grant public read access to this objects“)
  • Amazon S3 > YOUR_BUCKET > Permissions > Static Website Hosting: Use this bucket to host a website

You can now access your static website with your AWS S3 direct URL: http://YOUR_BUCKET_NAME.s3-website-YOUR_BUCKET_REGION.amazonaws.com/

4. Use an AWS Route 53 custom domain name to change the URL

To tailor our website URL to http://YOUR_SITE_NAME.com we need to hold the YOUR_SITE_NAME domain name. AWS Route 53 is a service that empowers you to buy for a yearly fee a domain name. Let’s do this in the Route 53 service in your AWS console.

  • AWS Route 53 > Register Domain: buy a free domain name for your site. (Need to be the same one as the bucket)
  • Wait for your domain name to be registered and available in your hosted zone
  • AWS Route 53 > hosted zone > YOUR_DOMAIN_NAME > Create Record Set > Name : (Leave it empty)
  • AWS Route 53 > hosted zone > YOUR_DOMAIN_NAME > Create Record Set > Type: A- Ipv4 address
  • AWS Route 53 > hosted zone > YOUR_DOMAIN_NAME > Create Record Set > Alias target: select your resource. (If you don’t see it, it means the bucket doesn’t have the same name as the domain and you need to create it anew)

That’s it. You can now access your site with YOUR_DOMAIN_NAME.com

5. WWW and

  • Create a www.YOUR_SITE_NAME.com bucket to redirect to YOUR_SITE_NAME.com bucket so your site is also available when typing www.
    • To do so create a www.YOUR_SITE_NAME.com bucket
    • www.YOUR_SITE_NAME.com bucket > Properties > Static Website Hosting > Redirect: YOUR_SITE_NAME.com
    • Go to route 53 and add an A record named www and pointing to this bucket.
  • Set up CloudFront and SSL to have access to https
    • Read here: https://docs.aws.amazon.com/AmazonS3/latest/dev/website-hosting-cloudfront-walkthrough.html

How to upload a folder content to AWS S3 in PHP?

From machine learning to a lambda function, most of the projects running on AWS relies on an S3 bucket to store the files you need for other AWS services.

Uploading using the AWS S3 bucket web interface can be impossible when the folder contents contain thousands of files. (or if this folder is only available on an Apache server running PHP)

Running a small PHP script is then a great way to simplify the process. You’ll just need the following prerequisites :

  • Create an IAM user with an Access Key and the role : AmazonS3FullAccess (read how : https://docs.aws.amazon.com/IAM/latest/UserGuide/id_users_create.html)
  • Download the AWS PHP Sdk to access AWS functionalities in PHP (read more : https://docs.aws.amazon.com/sdk-for-php/v3/developer-guide/getting-started_installation.html)

Once this is done, you’ll need to adapt the following PHP script for your use case and0/d run it with :

php -f YOUR_SCRIPT_FILE_NAME.php

Want to be notified when there is more?

Get in touch:

Categories

  • AWS EC2
  • AWS Lambda
  • AWS S3
  • AWS Tutorials
  • Azure DevOps
  • Highlight
  • IT Architecture
  • Oracle ADF
  • Oracle Database
  • Oracle SOA Suite
  • Oracle Tutorials
  • Route53
  • Tutorials
  • Weblogic
  • Wordpress Tutorials

Read more about:

ADF Apache AWS Bean binding bpel Certificate cli cloud convert Database Deployment EC2 ERROR Exception file First Value GIT HTTPS Icons IllegalStateException iterator Java Jdevelopper lambda Oracle Oracle ADF Performance php programmatically RichTable route53 row S3 script sendRedirectforward soa sql SSL table View Criteria View Object VO weblogic WordPress