Continuous integration(CI) and continuous delivery(CD) pipelines have become the norm in software engineering. In the corporate world, a CI/CD pipeline is especially useful to ensure your entire development team is following the best quality guidelines and drastically shorten the deployment cycle to satisfy your customers. Thus why all Cloud providers are now providing their CI/CD pipeline platform. In this tutorial, we will focus on how to use the Azure DevOps platform on a Java project.
Create a new Java spring web application on Azure App Service:
- Log on portal.azure.com
- Navigate to the App Services
- Add a new Web App
- Select your existing subscription level
- Remember its name
Create a new Java DevOps project on Azure DevOps:
- Log on dev.azure.com with the same Azure account
- Create a “new project” and enter the needed information

- Navigate to the project settings and activate all the services

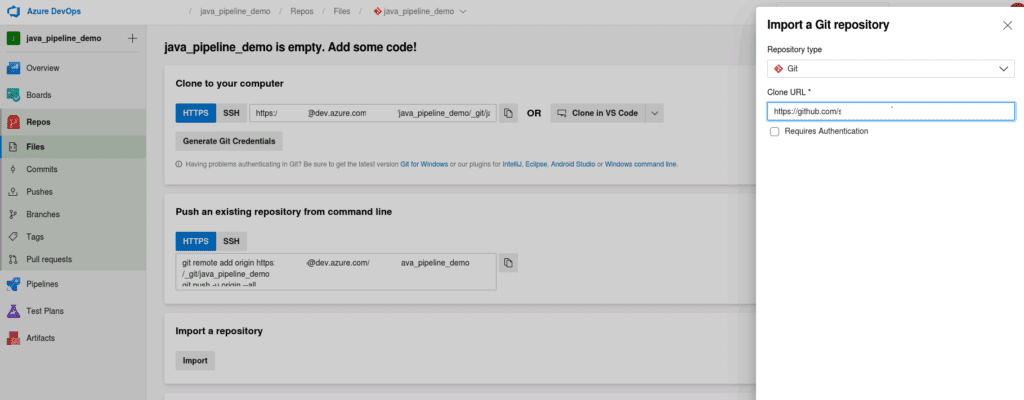
- Navigate to the “Repos” Service and import your Java code or Clone an existing git. (For this example take any sample spring web app on GitHub: https://github.com/ragsns/hello-world-spring-boot.git)
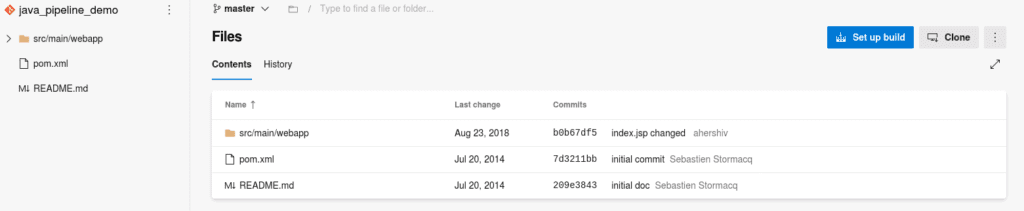
- Your Repository code is available as below
Create a build pipeline with Maven on your Azure DevOps Repository:
The objective here is to build your Java application everytime there is a commit or a merge on your master branch.
- Navigate to your Repository > Files > Set up build > New Pipeline > Configure > Maven Package
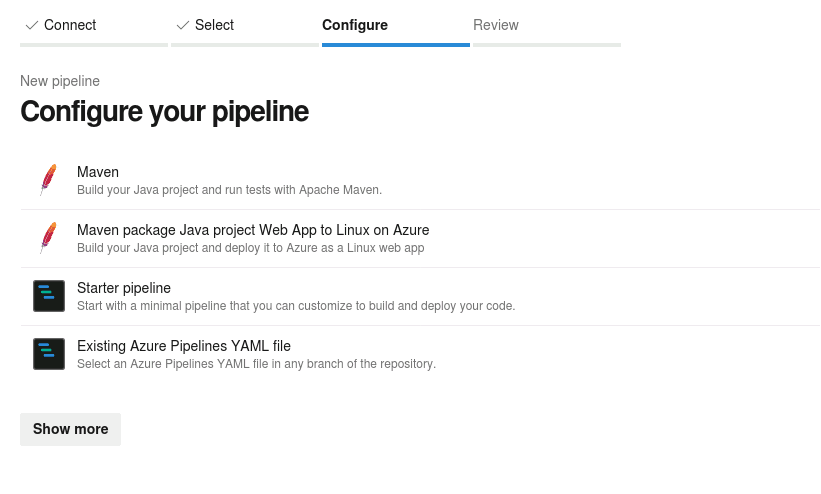
- Azure DevOps will generate its own azure-pipelines.yml as follow:
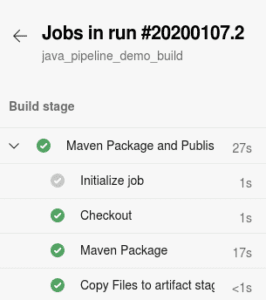
- To test your build pipeline, simply modify a file in your repository master branch.
Create a publish pipeline on your Azure DevOps Pipeline tool:
Now that we have a build pipeline to continuously test and build our codebase we can create a release pipeline to continuously deploy our modification to a development server.
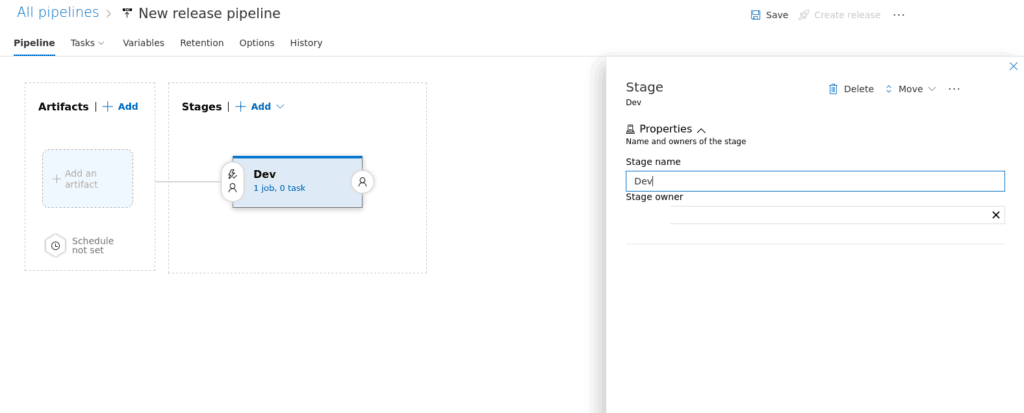
- Navigate to Repository > Releases > New Release Pipeline
- Select a Template > Empty Job
- Add a new stage to your empty build pipeline
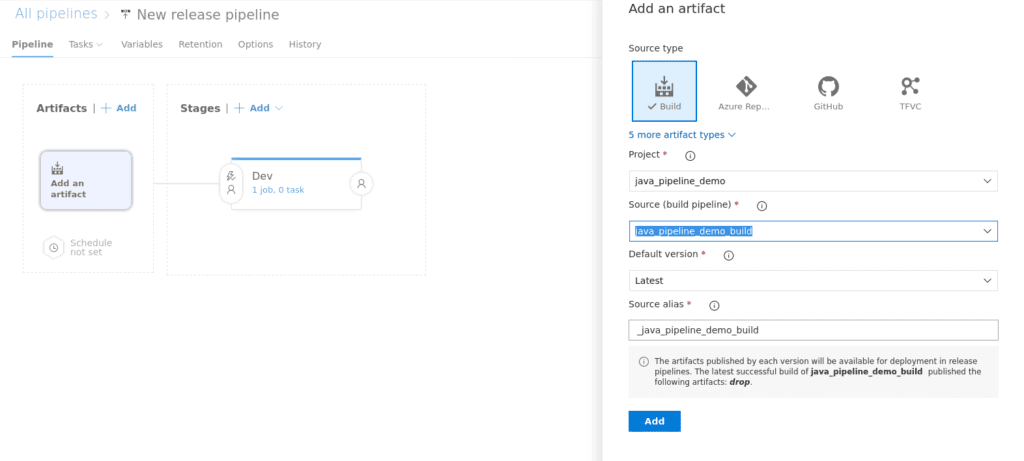
- On this new release, pipeline navigate to Artifact > Add > Source > java_pipeline_demo_build (or any other name you gave it)
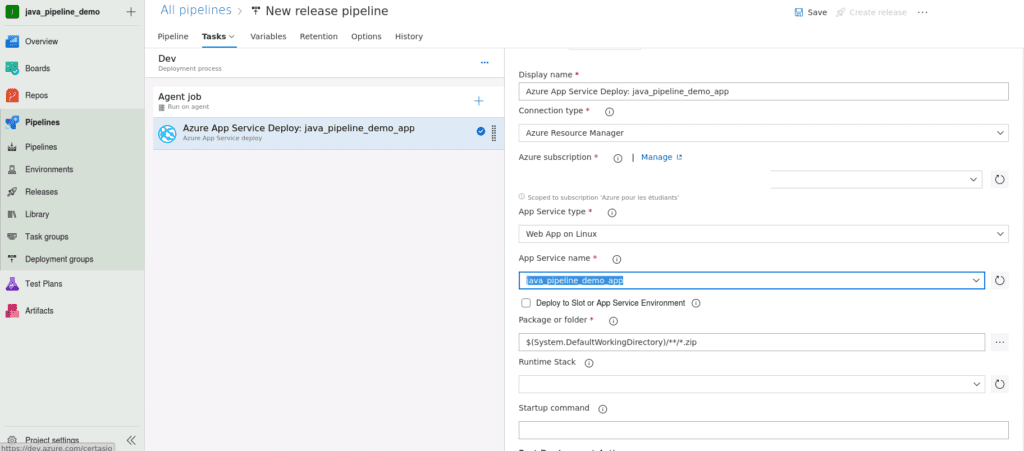
Now we need to specify on wich Azure App Service to deploy our Java artifact:
- On this new release, pipeline navigate to Tasks > Dev > Agent Job > + > Azure App Service Deploy
- Connection Type: Azure Ressource Manager
- Azure Subscription: YOUR_SUBSCRIPTION
- App Service type: Web app on Linux
- App Service Name: THE_NAME_YOUR_PROVIDED_ON_STEP_1
- Package or folder: Select the .war
- Runtime stack: Java SE (JAVA|8-jre8)
- On this new release, pipeline navigate to Pipeline > Artifact > Continuous deployment trigger > Enable
- Name the pipeline
- Save
- Create Release
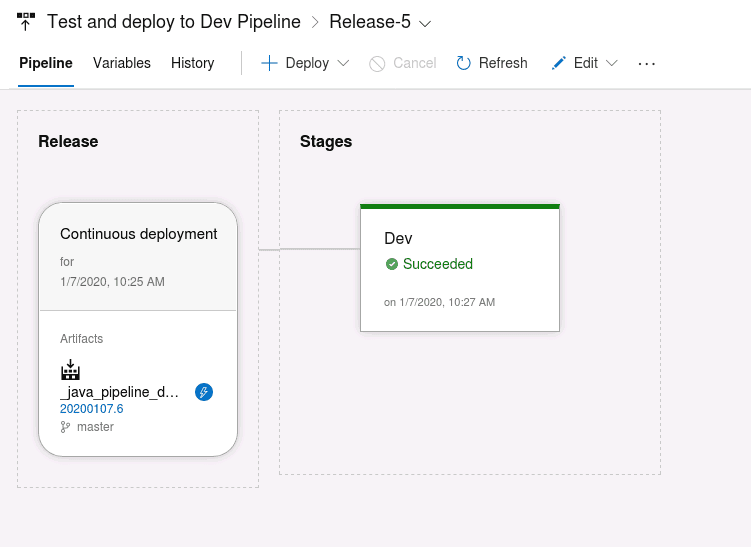
That’s it. From now on each commit on your Azure DevOps repository will trigger a build pipeline. The Java Artifact built will trigger a release pipeline. This release pipeline will add this Java Artifact to your Azure App Service server seamlessly deploying your modifications.